|
7/4/2018 0 Comments Natural Weed Killer
I don't need to go on about the evils of commercial weed killer... I am more of a DIY type so once I heard I could make my own weed killer that was safe for my pets to roam around in, I was on board. Unfortunately that is much easier said than done. After years of experimentation, here's what works for me.
I got a 2 gallon plastic tank sprayer from Lowe's (Husqvarna brand) and went to it. Now the sprayer is important, this one is steady and has worked for years but you have to wash it out when finished to get a longer life out of it. I broke one from keeping the mixture stored in there over winter. Eventually the mix just broke the thing down and it would not spray. I will leave it in for a week or so but as soon as I've used up the mix I rinse it out with water and leave it apart to dry. I tried several cheaper ones but they do not spray well and end up breaking on me. Below is a link to an amazon one that has since come available after I gave up on them; but it looks just like my Husqvarna one from Lowe's. On amazon I did find a steady supply of the ingredients so I keep them on hand so I'm ready to weed (see product information below). I mix this and apply once a week when it looks like no rain is around for a few days. I get 20% strength vinegar by the gallon and pour about half the gallon into my sprayer. To that I mix orange oil, about 1/8 of the bottle; it's not measured or scientific. I close up my sprayer, pump a few times and spray away. It will take a couple of days for the weeds to shrivel up and die. Some larger weeds will need a few sprays. I keep up weekly and weeds stay under control. Yes, the vinegar smells but much better than the commercial options.
0 Comments
5/30/2012 0 Comments Pallet Garden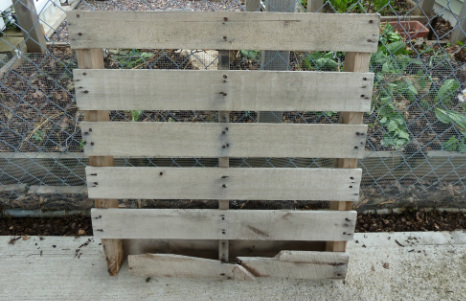 Pallet taken from neighbor Jim's driveway just waiting to be turned into a pallet garden! Last year I read about turning a pallet into a home for plants on one of my favorite blogs, Life on the Balcony. Fern made a beautiful gardern out of a pallet standing on it's side. I really wanted to try this but had no idea where to get a pallet so I kind of forgot about the idea. A few weeks after I forgot about these plans my next door neighbor had one in his driveway leaning against his garage! What luck, it was all worn in and busted, just how I like my gardening finds. He was quite happy to have me take it. I was so excited to read the instructions but quickly realized I had no place to lean this thing up to have it standing. I still wanted to give it a try so I laid it down in my driveway and found a place in the corner where it would look good. Since then I found some pieces of an interesting broken up old concrete sidewalk from my yard and laid them next to it (I just realized I don't have a photo of it yet, so I'll get on that soon!). I filled it with a random splattering of annuals. This year I threw seeds in it along with some moss roses and more random annuals (photos to come; these show last year's attempt). Overall, I was happy with the pallet. I thought about growing food in there but was worried about where that wood has been and what chemicals are in there (I have no idea where neighbor Jim got this thing!). For me another home for flowers is definately a good thing! 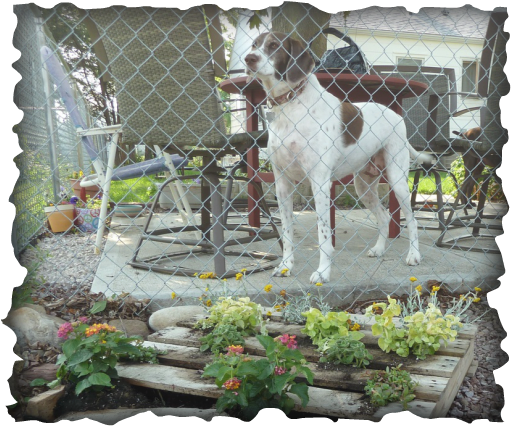
Daisy near the pallet garden. She really just wants the neighbor dog across the alley's toy!
5/27/2012 0 Comments Container Groupings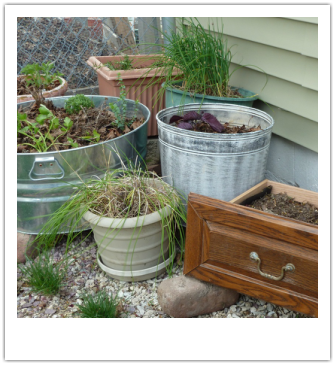 I have a small city yard so I have come to appreciate container gardening. I pretty much fill any space I can with plants, including the driveway! I already learned from Gayla Trail (You Grow Girl) that anything can be a planter but in reading McGee & Stuckey's Bountiful Container: Create Container Gardens of Vegetables, Herbs, Fruits, and Edible Flowers I learned how to upgrade your collections of containers into nice groupings. The photo to the left shows my driveway collection... the square and round terra cotta colored pots in the back were taken from a neighbor's garbage pile. They are in fine condition, but color is a little dated so I put them in the back. The green plastic one in front of it next to the garage I happen to have for years, along with the off-white plastic one in the front. The taller metal one I found at a local garden store marked down to $3, it just didn't have drainage holes so I had to drill myself. Which is obviously the same case for the dresser drawer also taken from a neighbor's trash pile (I also lined with landscaping cloth before adding the dirt). And the last shown in this photo is the large metal garbage pail I bought at Home Depot for $19 to plant potatoes in the bottom and herbs on top. The photo below shows my Daisy admiring the collection (she has a thing about watching me plant then immediately digging up my work!). Another tip I learned from a lecture by Gayla is that even those reusable shopping bags make a great garden. She recommends potatoes, which is what I put in this bag. It worked great, but already had a small hole in it so at the end of the season when I harvested and tried to move the bag it fell apart. Also, notice the bricks in front of the bag. When filling the bag with dirt, it kept getting wider. By putting the bricks in front of the bag and the back of the bag against the fence the dirt would go the depth needed for the potatoes (making it wider would be ok for other things but potatoes need the vertical space). The bricks are also the trick in the book to making a good grouping. Bricks are placed under planters to help elevate them to make an interesting arrangement. The smaller round pots used 3 bricks underneath as feet, the big trough took 4. The pots in the back I put rectangular shaped bricks that aren't as pretty under them to elevate. 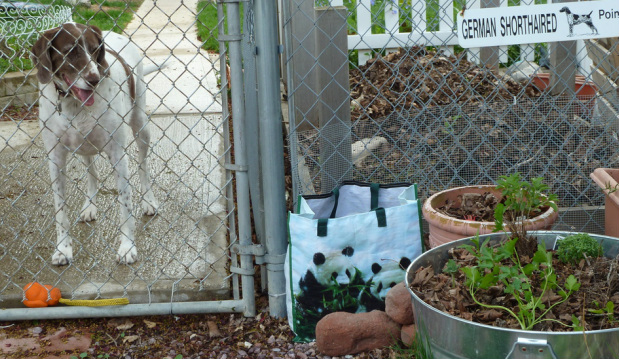  Here's the same grouping above one month later in June.
Potatoes are in the trough, metal pot and bag. Chives in the round green & off-white plastic planters. Turnips in the drawer. Herbs are in the metal pot and trough. Tomato plants are in the back plastic terra cotta colored pots. Also pansies were added throughout for color. Oh, and a watering can to catch the rain. Notice I was also patching up some bare spots in the yard and dropped grass seed, but I kinda like it! 12/30/2011 0 Comments Parts bin of plants?!One of my biggest gardening revalations came from my favorite gardening author, Gayla Trail of You Grow Girl. She says ANYTHING can be turned into a vessel for growing! I love this concept and have since repurposed dresser drawers, tote bags, plastic food containers, broken cookware and random wooden crates into inexpensive (or often free!) homes for plants. My husband has seen me several times while walking my dogs picking up cast aways from the curbside for new gardens! As we moved into a different space at work I saw this concept in action and saw how giant part crates could house tropical plants... 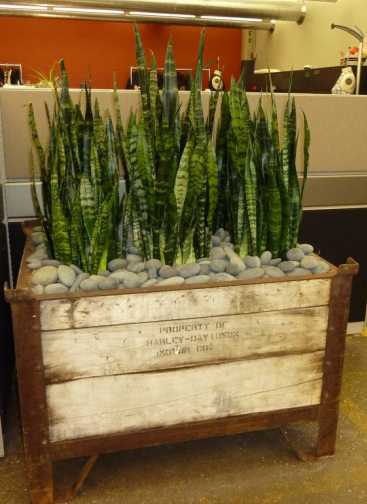 Finished recycled parts bin of mother-in-law's tongue. 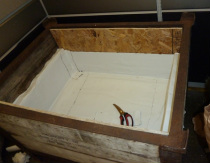 The parts bin was lined with plywood and an adhesive self healing paper (used for sealing around windows) was applied to the lower half to protect the wood from any water damage. 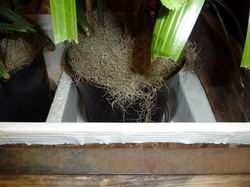 The bin is very large so several plants were used inside each. Plants are potted individually and sheets of styrofoam were added inbetween each pot. Pots were put in very close and were covered with moss to hide the styrofoam. On top of the moss large river rocks were added. When watering the plant, it is only watered at the base of each plant to make sure the water gets into the pot and not the spaces in between (although if it spills the container is protected!). I haven't tryed this yet myself at home, as my house is quite small but I'm keeping my eyes out for anything that could give this similar look. 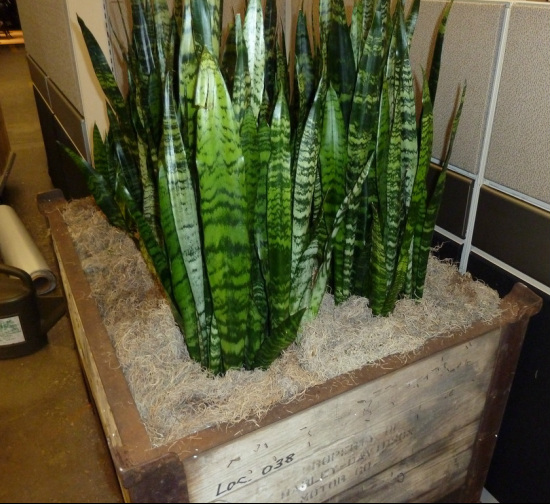 |
Jen's Garden...is a small city block in zone 5 so creative methods are used to make the most of 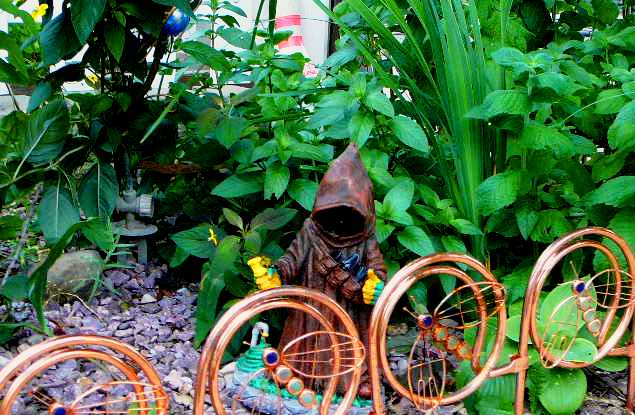
Archives
July 2018
CategoriesAll Containers Flowers Garden Harley-Davidson Natural Pallet Parts Bin Plants Recycle Weeds You Grow Girl |
 RSS Feed